This content is for members only.
Already have an account? Login
In this article, we talk about:
- What is Stable Baselines?
- History of Stable Baselines (Earlier Work in RL)
- How to install Stable Baselines?
- How to run Reinforcement Learning algorithms on Toy Environments like Cart Pole
This article assumes you are familiar with Python programming and have a basic idea of how Reinforcement Learning works. You don't need to be an expert in Reinforcement Learning to understand Stable Baselines, but a basic understanding of RL will certainly help. If you need a refresher in Reinforcement Learning, we recommend a few resources below for you to get started.
Recommended Resources for Reinforcement Learning
- Deep RL Course by Hugging Face - (Link)
- Reinforcement Learning Lectures by David Silver on YouTube - (Link)
Introduction to Stable Baselines
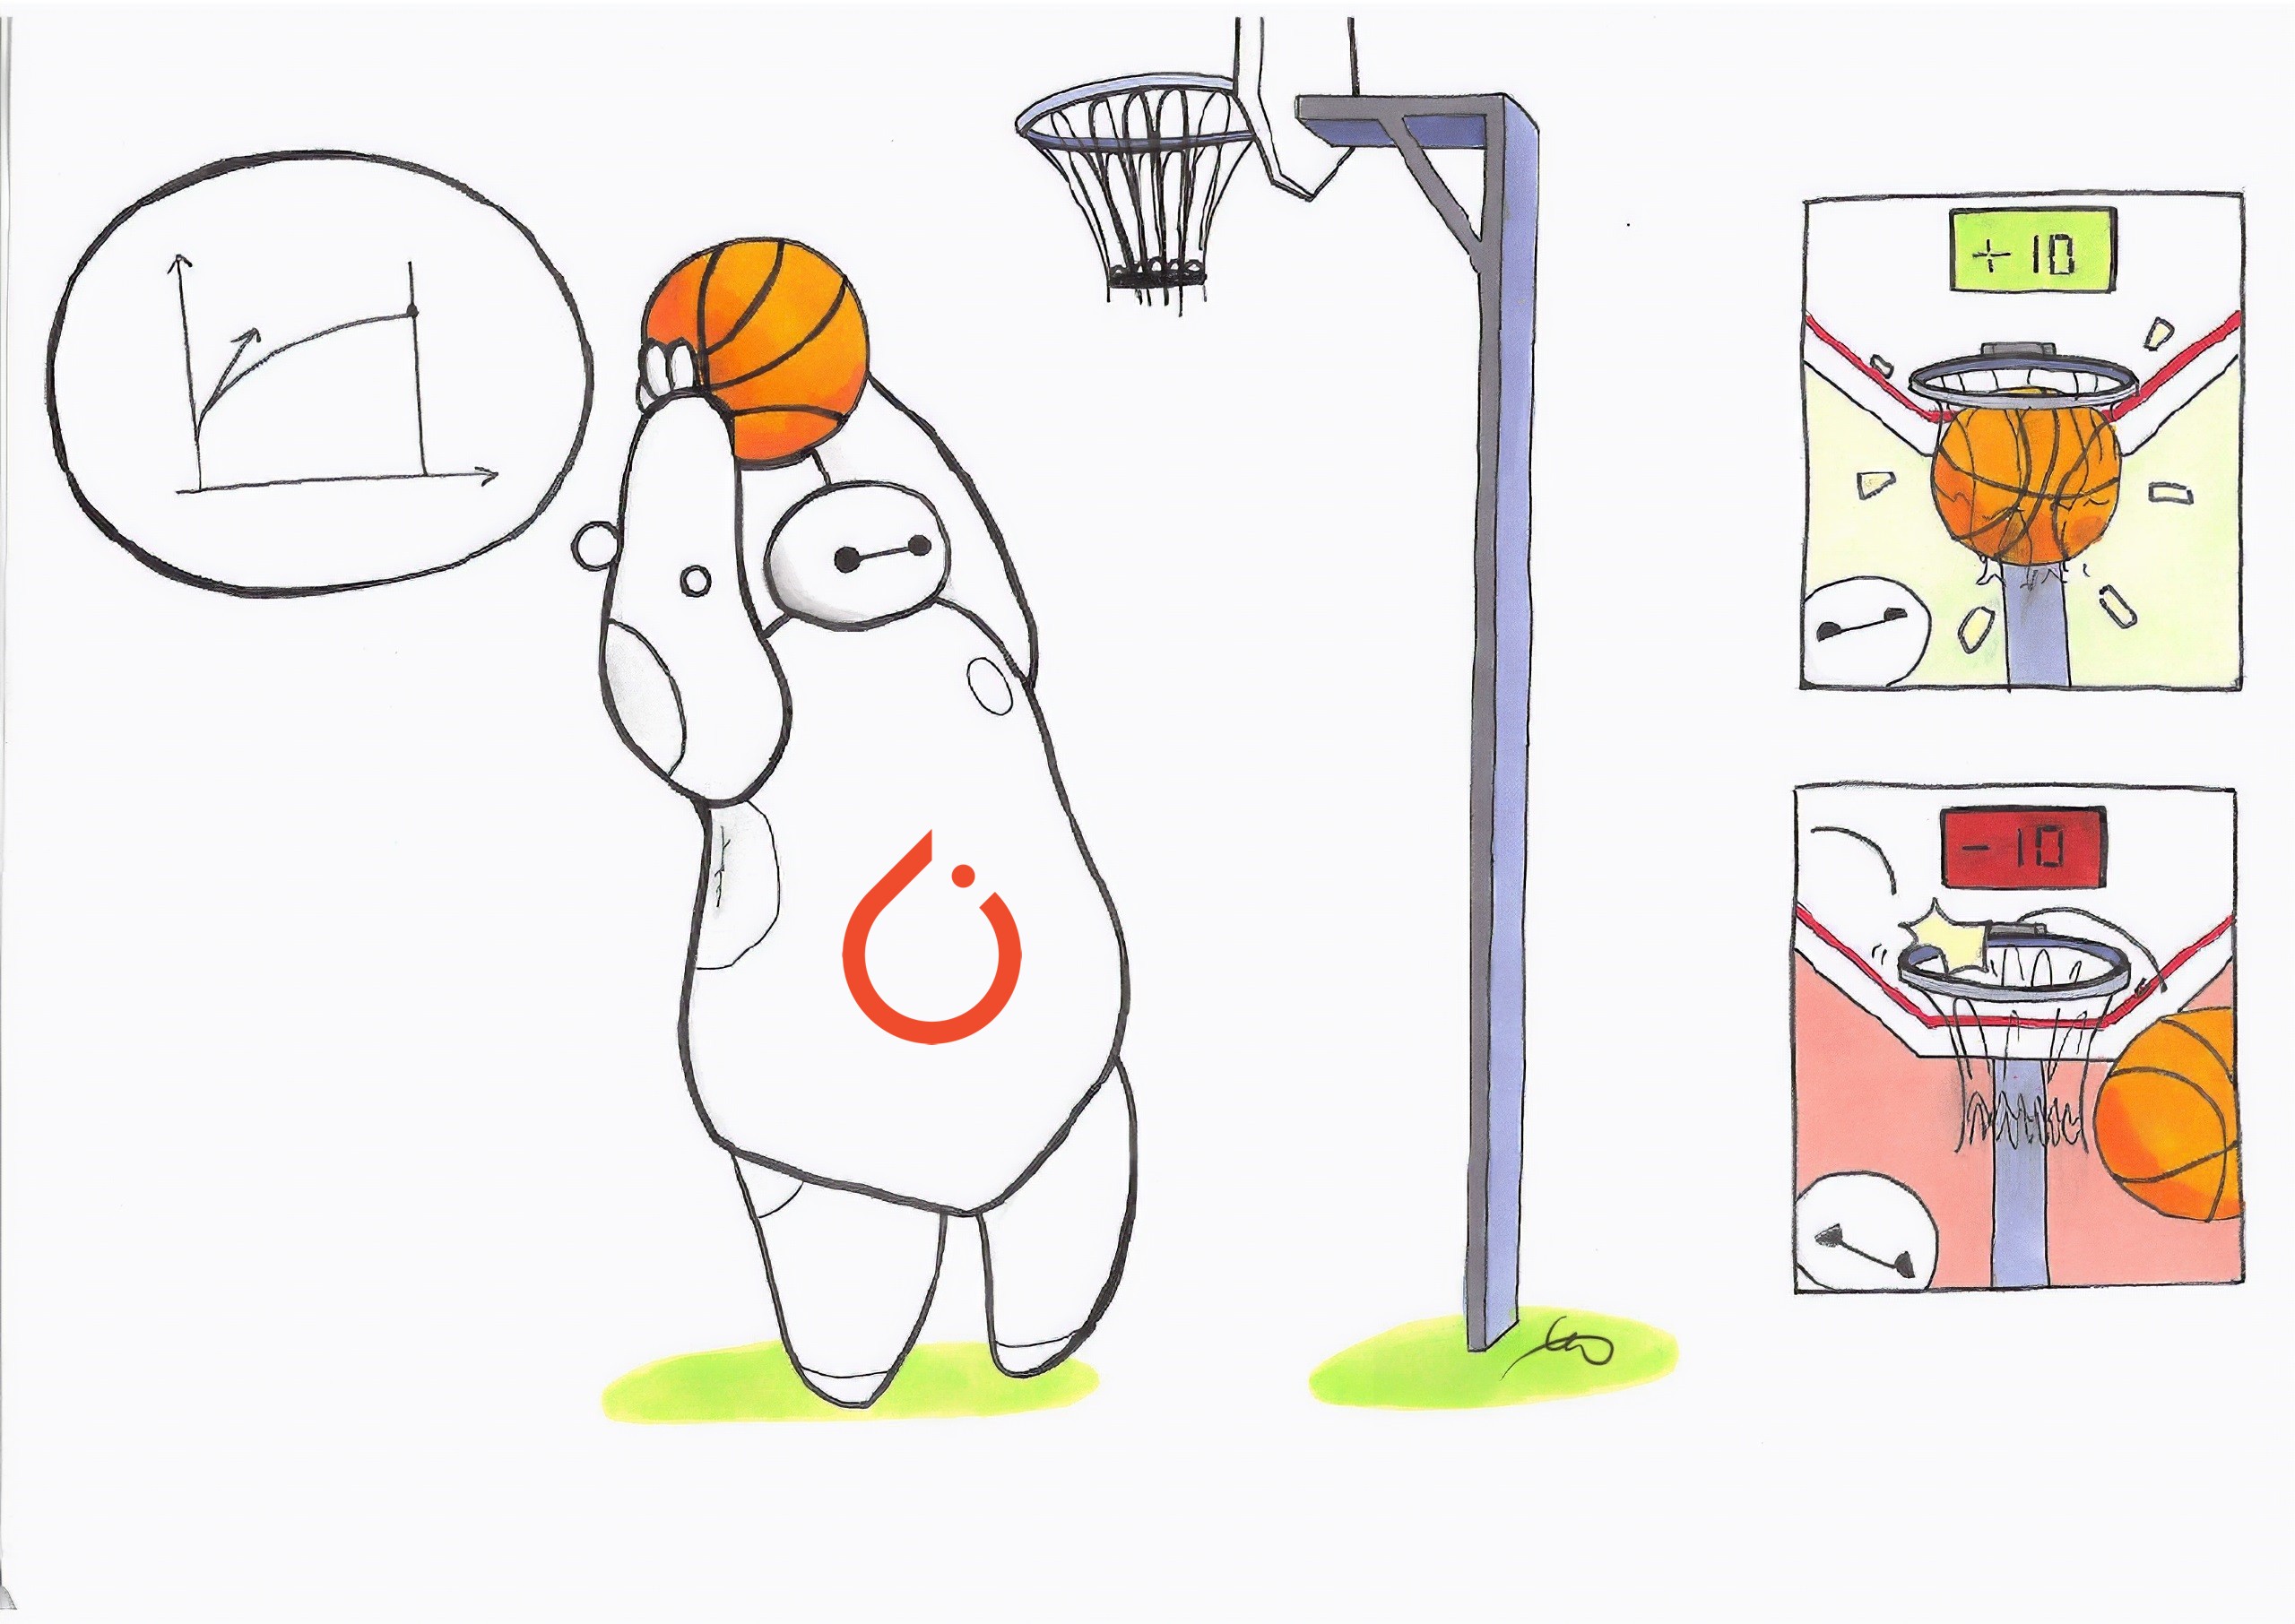
Stable Baselines is a Reinforcement Learning framework that provides implementations for many different RL algorithms out of the box. It allows developers to train and test famous RL algorithms like A2C, DQN, PPO, TD3, and more, without having to write the entire code for the algorithm themself. On May 24, 2017 OpenAI released a framework called "Baselines" which was a collection of high-quality implementations of reinforcement learning algorithms. Stable Baselines is a set of improved implementations of Reinforcement Learning (RL) algorithms based on OpenAI Baselines. However, as of 2021, Stable Baselines has gone into maintenance mode which means it will not be developed further and only bug fixes will be addressed. Therefore, developers are being encouraged to migrate to Stable Baselines 3 - an improved and more reliable alternative of Stable Baselines that is made with PyTorch. To keep this article relevant, any mention of Stable Baselines (or its acronym SB) would mean Stable Baselines 3. We may also use the acronym SB3 to refer to Stable Baselines 3.
Installing Packages
Stable Baselines 3 is a Python package and therefore requires Python (>= 3.5) to be installed. You can check the version of Python you have by running the following command on Command Prompt or Terminal:
python --versionIf it says something like "Python is not recognized as an internal or external command, operable program or batch file" that means Python is not installed on your computer. In that case, you will first have to download and install Python by going to their official website or from this link - Python Download Page. Once done, you can confirm that Python is correctly installed by running the above command again. Next, you need to install Stable Baselines 3. You can use the pip package manager that comes with python to automatically download and install SB3 for you by running the following command on Command Prompt or Terminal:
pip install stable-baselines3For more specific instructions on installing Stable Baselines, you can refer to their installation guide here - SB3 Installation Guide. Next, we need to install the "gymnasium" package from OpenAI. Gymnasium is an open source library used for developing RL algorithms. It provides standard APIs to communicate between different learning algorithms and create custom as well as standard environments for RL. You can use the same pip package manager to install gymnasium by running the following command:
pip install gymnasiumFor more specific instructions on installing Gymnasium, you can refer to PyPI's installation page here - Install Gym. Once that is done, you are ready to create an RL environment and train your first RL algorithm.
The Cart-Pole Environment
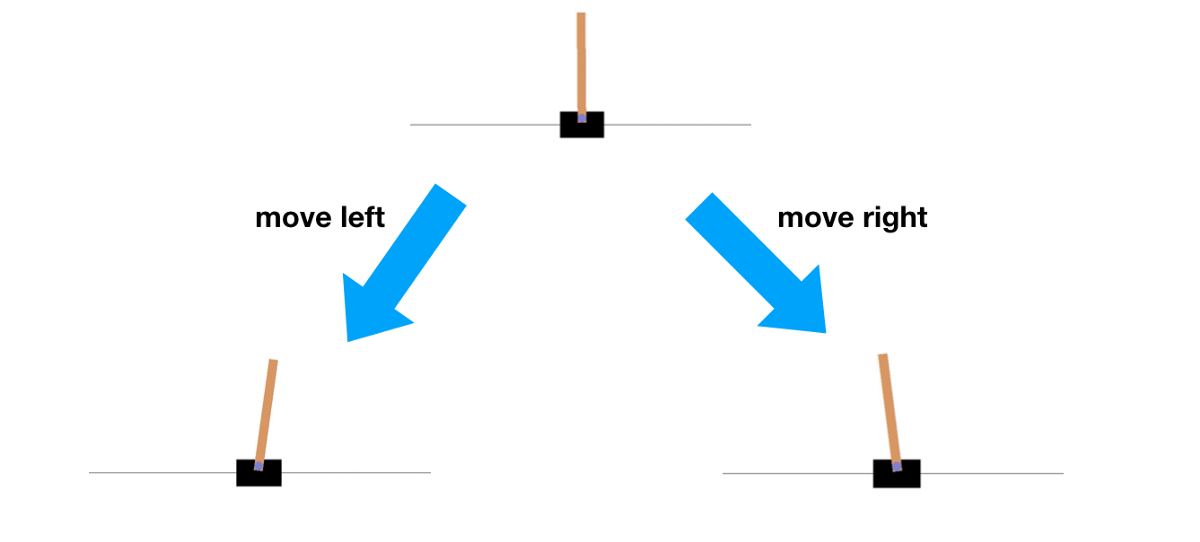
We will begin out deep dive into RL and Stable Baselines 3 by exploring the Cart Pole environment provided by Gymnasium. Cart Pole is a type of a classic control environment where the job of the RL Agent is to control (learn to balance) a stick attached to a cart that is placed on a frictionless surface. The agent receives a positive reward if it can keep the stick upright and a negative reward if the stick starts to fall down. To balance the stick, the agent can push the cart right or left which causes the stick to turn anticlockwise and clockwise respectively due to the motion of the cart.
Note: Cart Pole is one example of a classic control environment. Gymnasium also provides other different categories of environments for developing and testing RL algorithms like Box2D, Toy Text, Atari etc. There are also other types of classic control environments available like Acrobot, Mountain Car, Continuous Mountain Car, and Pendulum. You can read more about them here - Classic Control Environments. A visualization of the Cart Pole game is also available on the Gym's official documentation here - Cart Pole - Gymnasium.
The RL Framework
Let's see how we can frame the Cart Pole game as an RL problem. To frame any problem as an RL problem, we need to define 3 basic things about the problem.
- The actions that the agent can take
- The observation that agent receives
- The reward that the agent receives
For the Cart Pole environment, there are only two actions that the agent can take at any time. These are:
- Move the Cart Right
- Move the Cart Left
The observation that the agent receives from the environment consists of four things:
- The position of the cart along the x-axis
- The velocity of the cart
- The angle of the stick from the vertical
- The angular velocity of the stick
We leave it up to the reader to verify why the above four properties of the environment are sufficient for the agent to decide an action to take at each state. Since the goal of the game is to keep the pole upright for as long as possible, by default, a reward of +1 is given for every step taken, including the termination step. The maximum reward that the agent can get for an episode is 500 for Cart-Pole-v1. There is also a different version of Cart Pole available ("CartPole-v2") where the maximum reward possible for an episode is 200. By design, the episode ends if
- Pole Angle is greater than ±12°
- Cart Position is greater than ±2.4 (center of the cart reaches the edge of the display)
- Episode length is greater than 500 (200 for v0) - Episode Truncated
With this framework, we are now ready to start training our first RL Agent to learn to balance the pole in the upright position.
Importing Dependencies
To begin, we first need to create a new Python file and import the following packages from Stable Baselines and Gym. A summary of what these packages will be used for is added as comments with the code.
# 1. Import Gym For Creating an Environment
import gymnasium as gym

# 2. Import an RL Algorithm to be trained
# This is the Agent that will learn how to balance the pole
# In this tutorial, we will be using PPO as our agent
from stable_baselines3 import PPO

# 3. Import a Helper Utility to Evaluate our Trained Agent/Model
from stable_baselines3.common.evaluation import evaluate_policy

# 4. Import a Helper Utility to Evaluate our Trained Agent/Model
from stable_baselines3.common.monitor import Monitor
Creating the Environment
Next, we will create an Environment. Since the Cart Pole environment is already available to us from Gym, we can simply use the gym.make() function to create an instance of Cart Pole like so:
# Use the gym.make() function to use already available Cart Pole environment
# Make sure to pass the identifier string - `CartPole-v1` exactly as shown below
env = gym.make("CartPole-v1")
Creating an Agent
Next, we will create an agent that will learn how to balance the pole by interacting with the environment multiple times. In this tutorial, we will use Proximal Policy Optimization (PPO) for our agent because an implementation for it is already provided by Stable Baselines 3. PPO is a very powerful and stable reinforcement learning algorithm that uses a policy to learn the best moves to make in any given state. We will learn more about policy-based algorithms in later articles but for now you can think of a policy as the Agent's brain that tells what Action to take in each state.
For our model, we will use the Multi-layer Perceptron Policy (or "MlpPolicy" in short), but there are other policies also available in SB3 like the "CnnPolicy" and "MultiInputPolicy". You can read more about MlpPolicy here - PPO MLP Policy.
For now, create an Agent using the "MlpPolicy" the policy and environment instance created above like so:
# Create an instance of PPO which will be our Agent
# Use MlpPolicy for Policy
model = PPO("MlpPolicy", env, verbose=1)
Note that we are setting an additional argument "verbose" as 1 so that we can monitor how well the agent is doing during training.
Training the Agent
Finally, we will start the training using the learn() method available in PPO package. We will train it for a total of 10,000 timesteps so that the training finishes quickly. However, you can experiment with much bigger timesteps to see how the model is does over longer training runs.
# Train the Model for 10,000 timesteps
model.learn(total_timesteps=10_000)
Testing the Agent
Once we have a trained agent ready, we want to see how well the agent learned by testing it on an "evaluation" environment. An evaluation environment is different from the training environment only in the sense that it is a fresh world for the agent to show its skills and for us to observe. We will create an evaluation environment by wrapping the same gym.make() function call in a "Monitor" wrapper. Monitor is a SB3 utility for Gym environments that logs useful information like the episode reward, episode length, total time elapsed and other useful data for diagnosing the performance of the agent.
We will also use evaluate_policy() method from SB3 to evaluate our trained agent. The code for this is given below:
# Wrap a fresh instance of Environment in Monitor wrapper
eval_env = Monitor(gym.make("CartPole-v1"))

# Evaluate the Trained Agent on a Evaluation Environment
mean_reward, std_reward = evaluate_policy(model, eval_env, n_eval_episodes=100)

# Print the Evaluation Performance
print(f"Mean_reward:{mean_reward:.2f} +/- {std_reward:.2f}")
We are now ready to train a PPO agent and test its performance on an evaluation environment. Use a Terminal / Command Prompt to run your Python script using the following command
python <name_of_file>.pyYou should see the training metrics being printed on the console as the RL agent explores the environment and learns the rules of the game. These will look something like this:
------------------------------------------
| rollout/                |              |
|    ep_len_mean          | 26.9         |
|    ep_rew_mean          | 26.9         |
| time/                   |              |
|    fps                  | 897          |
|    iterations           | 2            |
|    time_elapsed         | 4            |
|    total_timesteps      | 4096         |
| train/                  |              |
|    approx_kl            | 0.0072788033 |
|    clip_fraction        | 0.0916       |
|    clip_range           | 0.2          |
|    entropy_loss         | -0.687       |
|    explained_variance   | 0.003520608  |
|    learning_rate        | 0.0003       |
|    loss                 | 7.46         |
|    n_updates            | 10           |
|    policy_gradient_loss | -0.0142      |
|    value_loss           | 58.8         |
------------------------------------------
In the metrics, try to keep an eye on the "ep_rew_mean". This is the mean reward the agent is receiving across a set of episodes. Remember, for the Cart-Pole-v1, the maximum reward that the agent can get is 500 so the closer this number is to 500 the better the agent is doing.
At the end of training, the trained RL model will be evaluated on an evaluation environment and it's mean reward along with the standard deviation of the reward will be printed on the screen. And that's it! Just like that you have trained and tested your very first RL Agent on a moderately challenging problem using Stable Baselines 3. Cart Pole is fairly easy, but the same basic structure applies when solving more challenging and difficult RL problems and SB3 can help you model them very quickly and effectively.
In upcoming articles, we will post more tutorials on how to use SB3 to solve even more challenging problems. We will also talk about creating Custom Environment so you can train Agents on a Custom Problem of your own choosing. Till then, if you have any questions or suggestions on this topic, please do let us know in the comment and we'll be happy to help you out. Stay safe and Happy Learning!